Changing label rolls on your DA210 series printer is a quick and simple process, but doing it correctly ensures smooth operation and accurate label detection. This guide walks you through how to change gap media labels on the DA210, DA220, DA310, and DA320 models.
What You’ll Need:
- A roll of Label media with gaps (labels with spaces between each one)
- Your DA-series printer (DA210, DA220, DA310, or DA320)
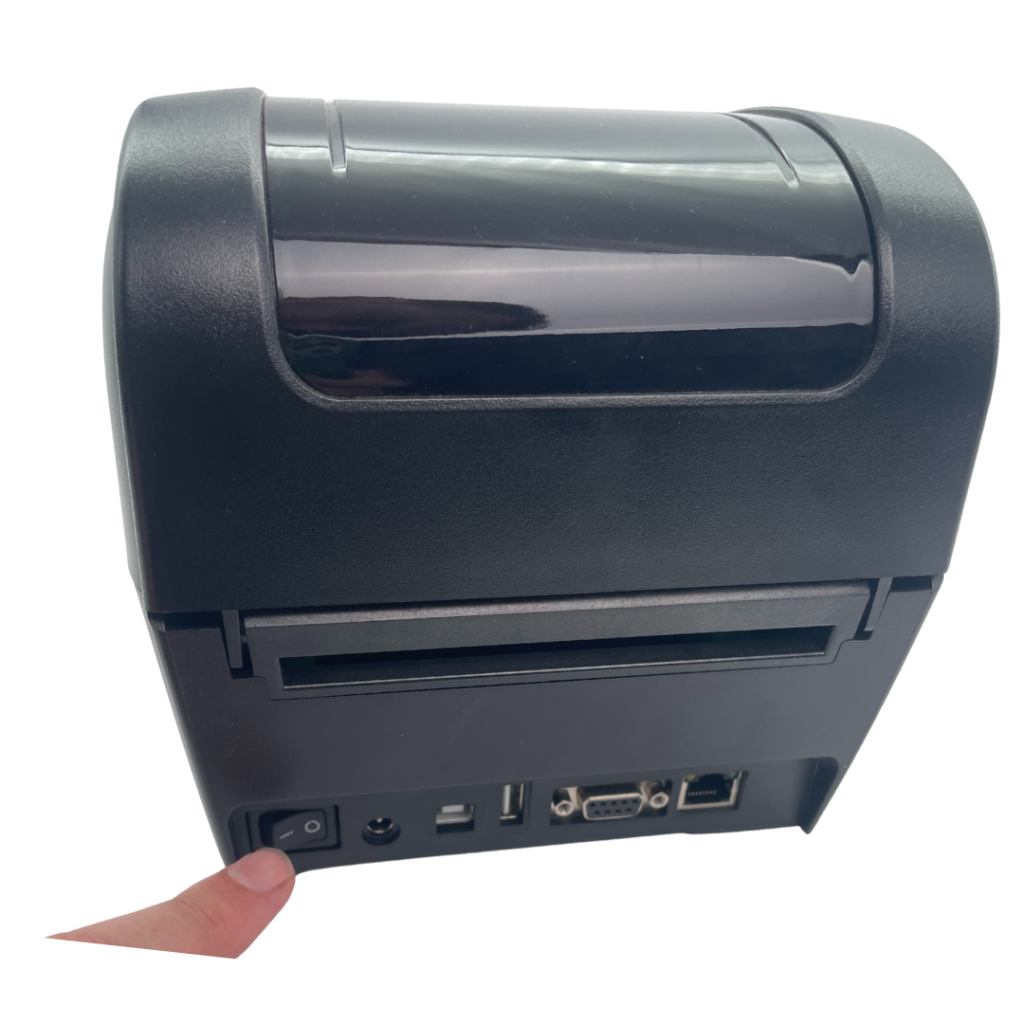
Turn the Printer off
Open the Printer Cover
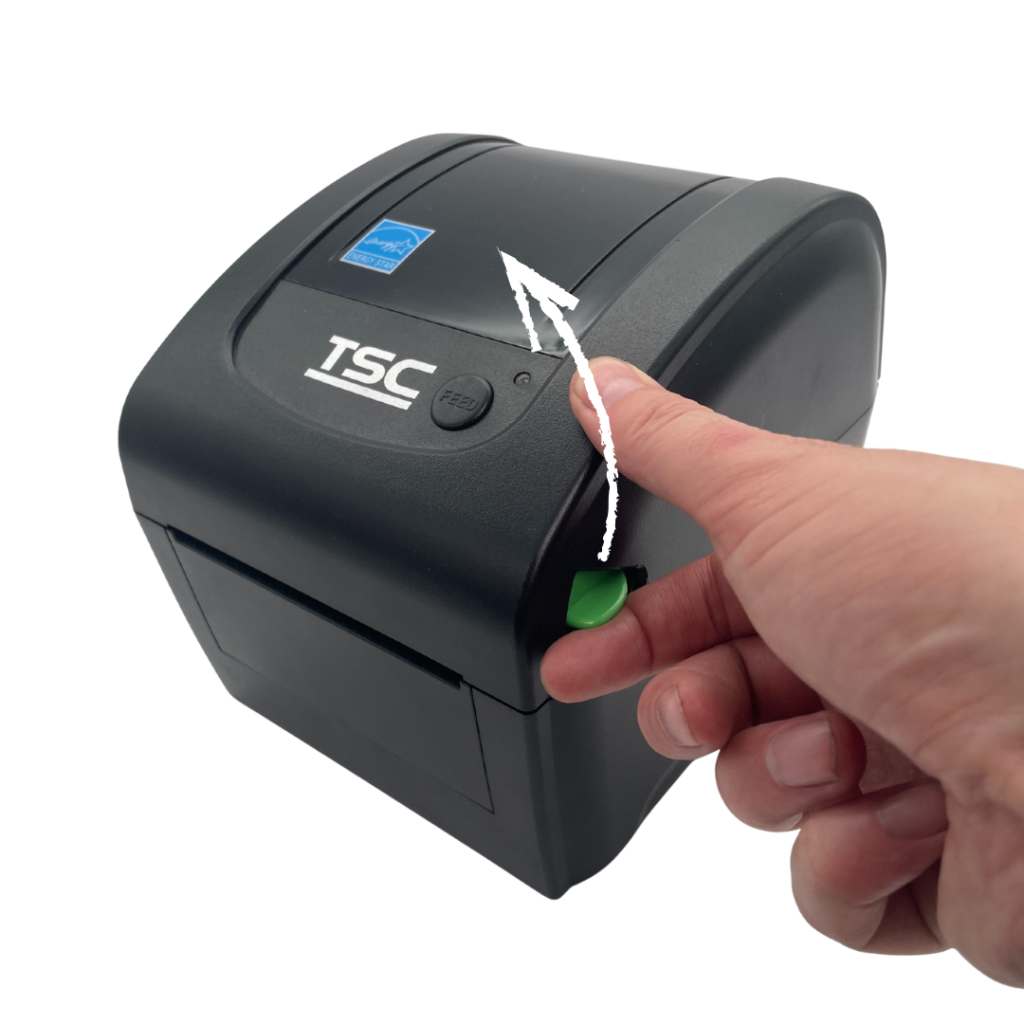
Lift the top cover to expose the media compartment.
Remove the Old Label Roll
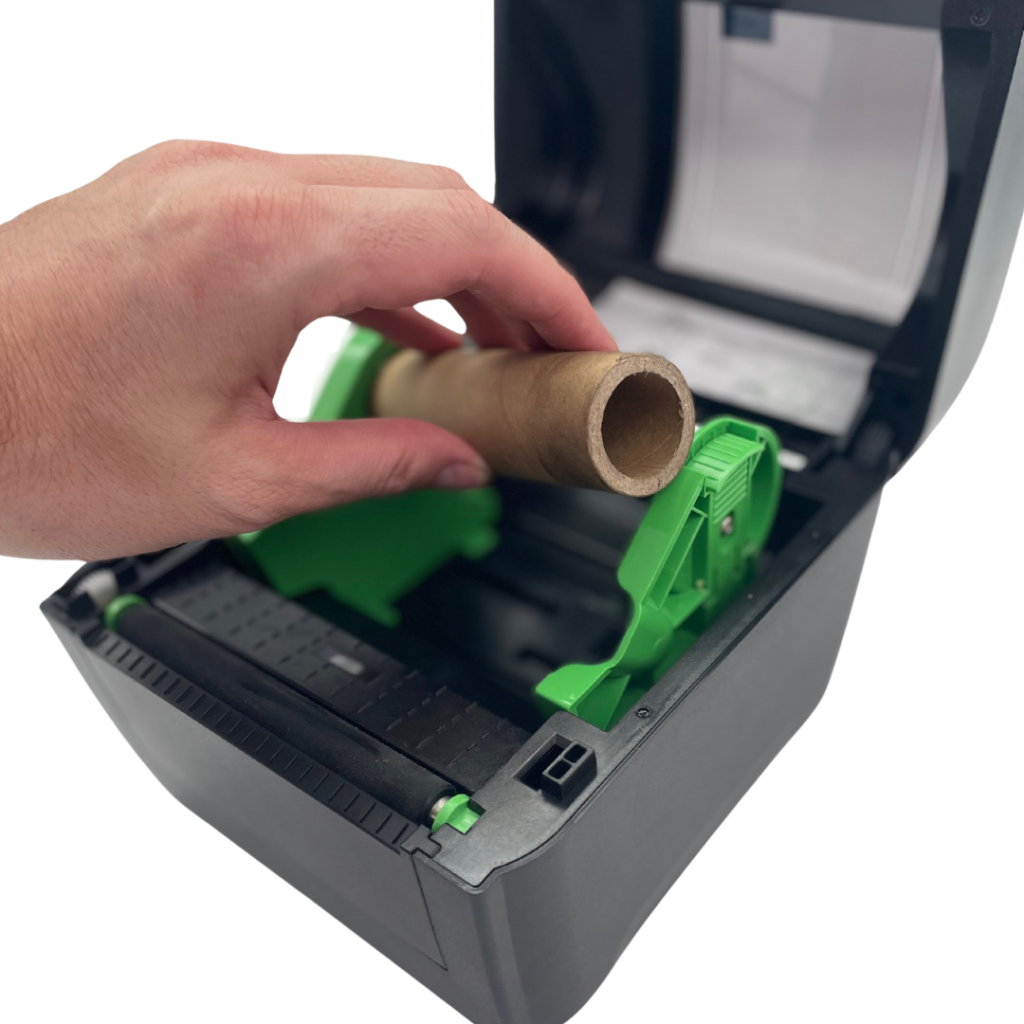
If there’s an existing roll, open the spring loaded green roll holder.
Load the New Label Media Roll
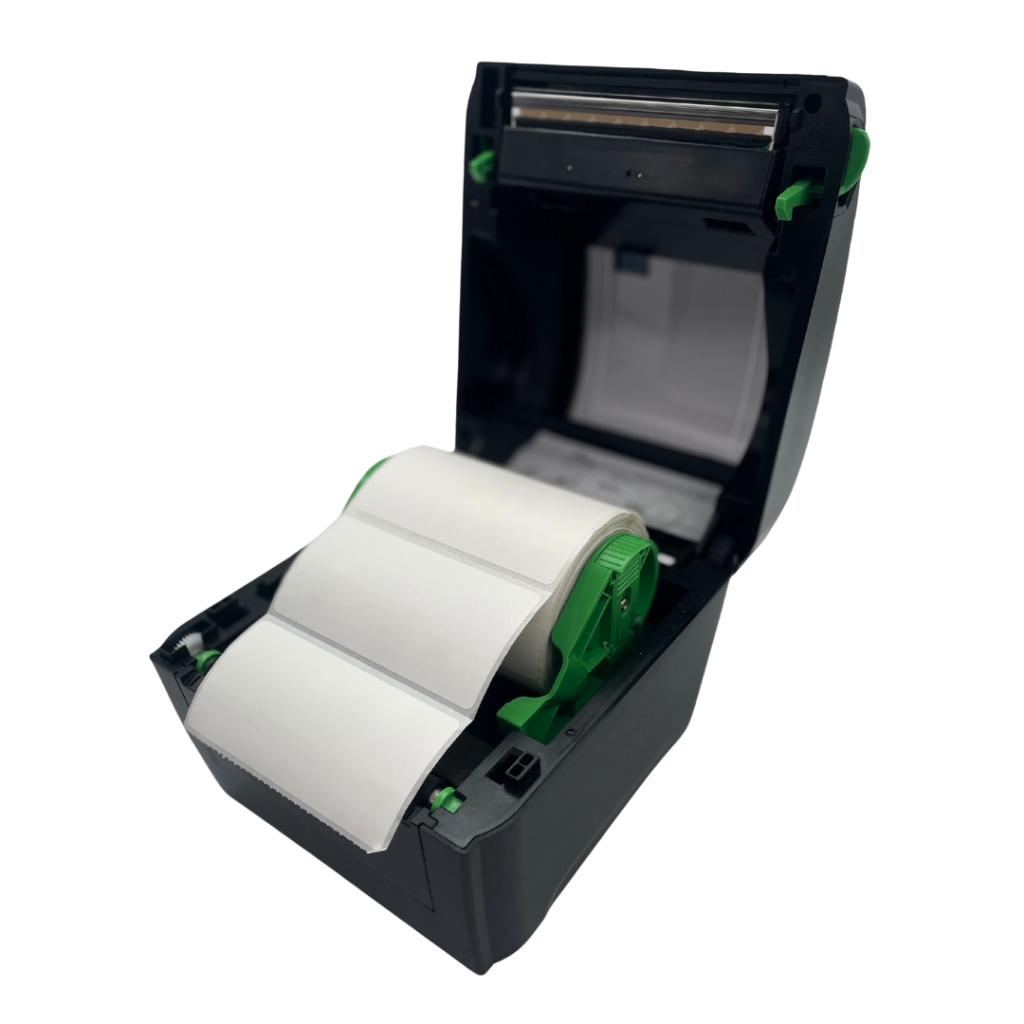
- Place the new roll into the free roll holder.
- Feed the labels through the print head assembly.
- Make sure the labels are aligned and the gaps are visible between each label
Close the Printer Cover
Once everything is aligned, close the cover securely.
Calibrate the Sensor
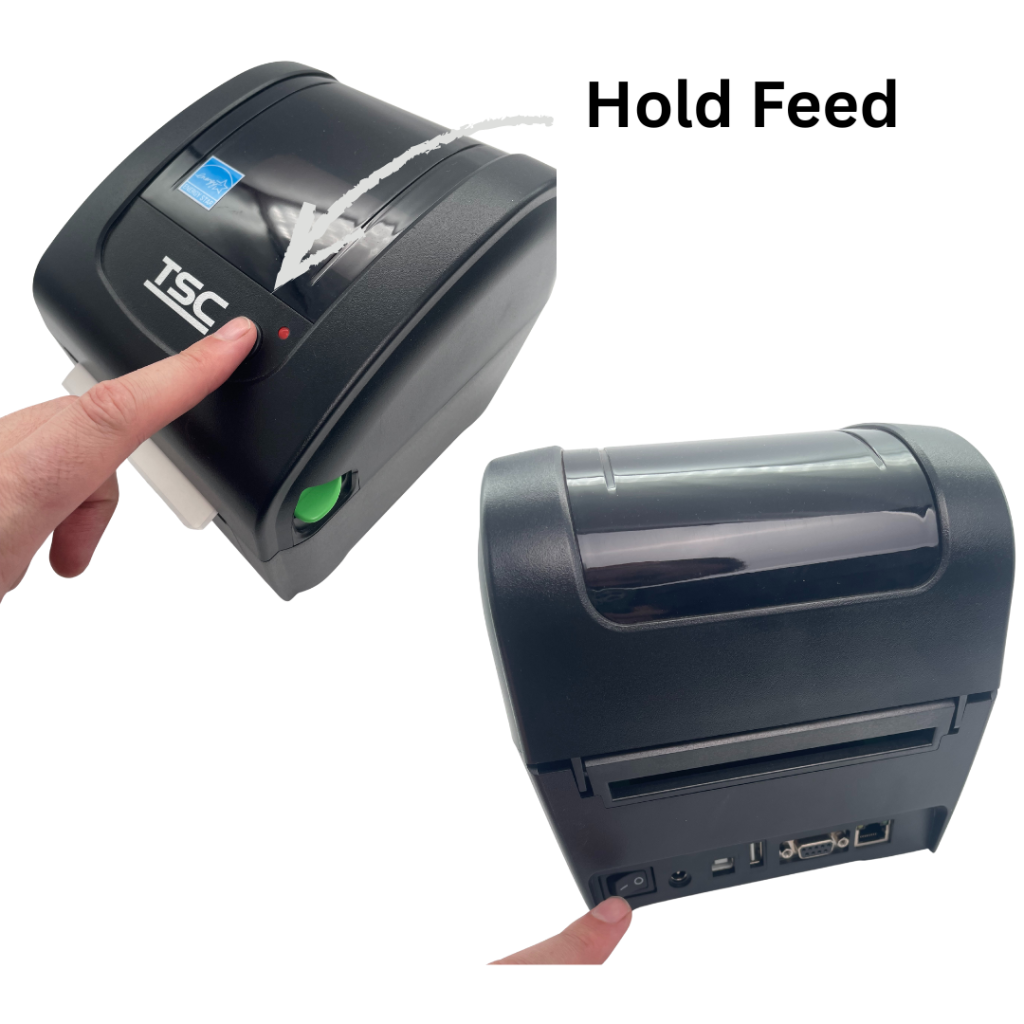
To ensure accurate label detection:
- Hold down the Feed button & turn the printer on, until the printer LED starts flashing red.
- This triggers auto-calibration, allowing the printer to detect the gap size and label length.